
10 Back-to-School Braid Hairstyles That Stay Cute All Day

Getting ready for school doesn’t have to mean a boring ponytail every single morning. These 10 back-to-school braid hairstyles are made to survive backpacks, PE, humidity, and long school days while still looking cute by the final bell. You’ll find options for straight, wavy, and curly hair, with ideas that flatter round, oval, and heart-shaped faces. Most styles are quick once you’ve tried them once or twice, and they work on medium to long hair, with a few ideas that still suit shorter cuts. You’ll want a brush, a tail comb, small elastics, and a bit of light-hold spray or gel. Pick one to be your new “school uniform” braid or switch them up through the week.
Quick List:
- Classic Low Three-Strand Braid
- High Pony Braid
- Half-Up Ribbon Braid
- Dutch Pigtail Braids
- Fishtail Side Braid
- Braided Headband
- Bubble Braid Ponytail
- Braided Low Bun
- Boxer Braids into Ponytail
- Tiny Accent Braids
1. Classic Low Three-Strand Braid
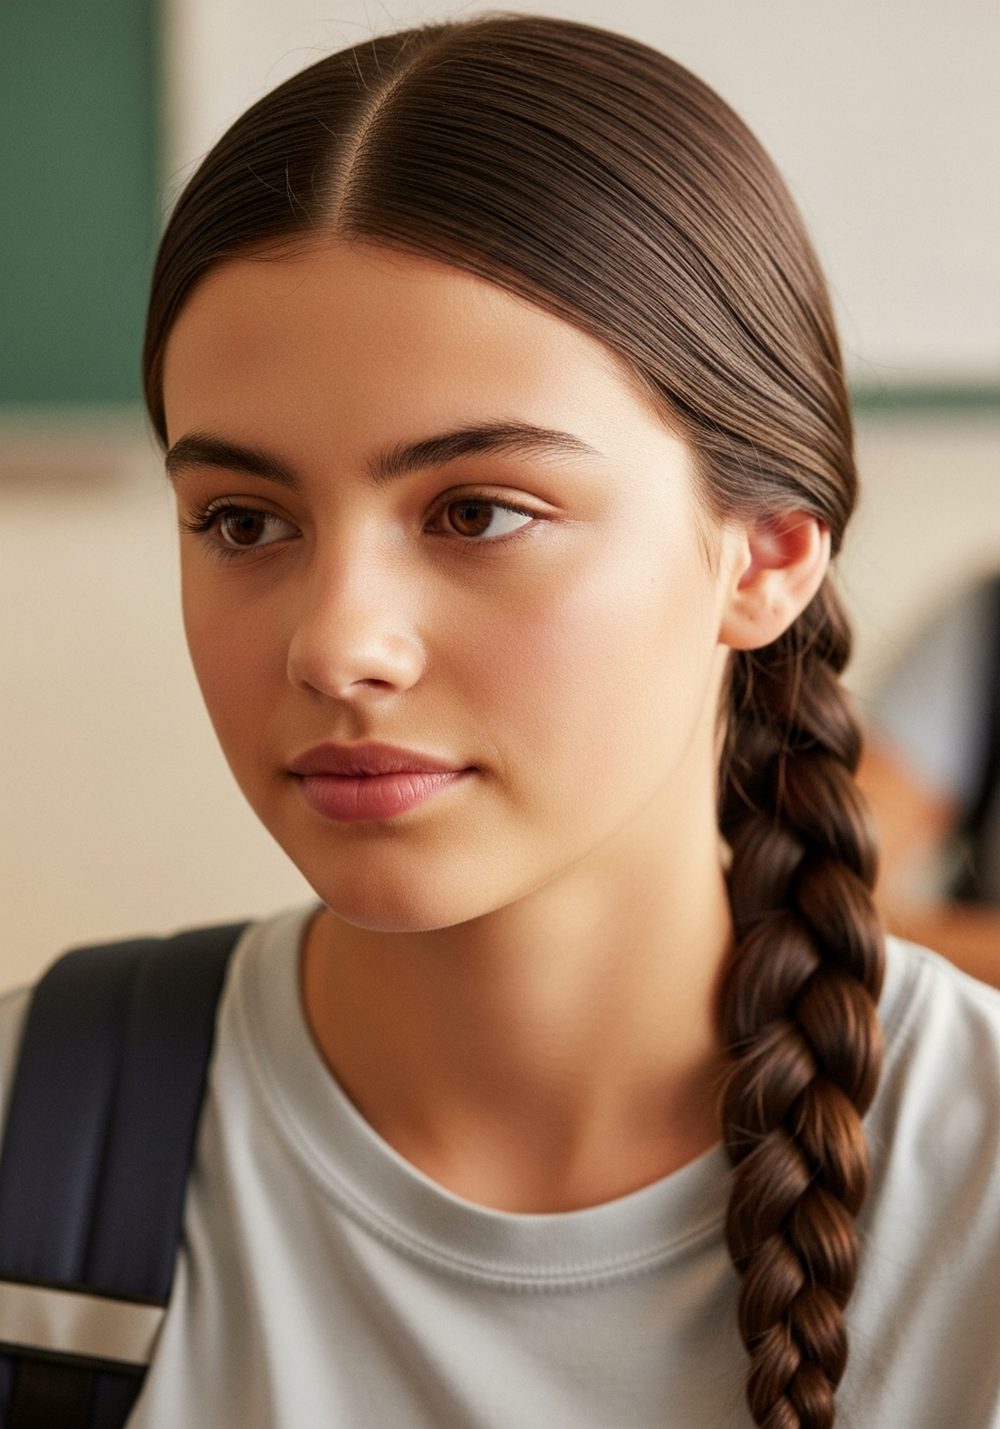
This is the easiest braid to master and the one that always looks put-together, even when you woke up late. A low three-strand braid sits at the nape of your neck, so it feels comfy against chairs and backpack straps. It keeps hair away from your face and helps reduce tangles through the day, especially if your hair frizzes or knots easily. You can keep it sleek for a neat vibe or gently pull the sides for a softer, fuller look. Add a cute scrunchie or bow that matches your outfit and you’re done. It’s also a great “reset” style on second- or third-day hair when you don’t want to wash.
How To Style
- Brush hair back and gather it at the nape of your neck.
- Divide into three equal sections.
- Cross the right section over the middle, then the left over the new middle.
- Repeat until you reach the ends and secure with a small elastic.
- Gently tug the braid sides if you want it to look a bit fuller.
Best For
- Face shapes: Oval, round, heart
- Hair types: Straight, wavy, soft curls
Tools & Products
- Brush or paddle brush
- Tail comb for clean parting
- Small snag-free elastic
- Light smoothing cream or serum
- Light-hold hairspray
2. High Pony Braid

The high pony braid is sporty, playful, and perfect for days when you have PE, practice, or lots of running around. By starting with a high ponytail, the braid stays off your neck and shoulders, which helps you stay cooler and stops hair from catching under your backpack straps. It looks great on straight or wavy hair and gives a small “lift” to your face, almost like an instant mini facelift. You can keep it super sleek for a polished look or leave a few soft pieces around the front for a relaxed feel. This style holds up well even if you move a lot, especially if you wrap an extra elastic mid-braid for security.
How To Style
- Brush hair into a high ponytail at the crown of your head.
- Secure tightly with a strong elastic.
- Divide the ponytail into three sections.
- Braid in a simple three-strand braid down to the ends and secure.
- Smooth flyaways with a tiny bit of gel or hairspray.
Best For
- Face shapes: Round, square, oval
- Hair types: Straight, wavy
Tools & Products
- Brush
- Strong hair tie for ponytail
- Small elastic for braid ends
- Light gel or styling cream
- Hairspray for hold
3. Half-Up Ribbon Braid
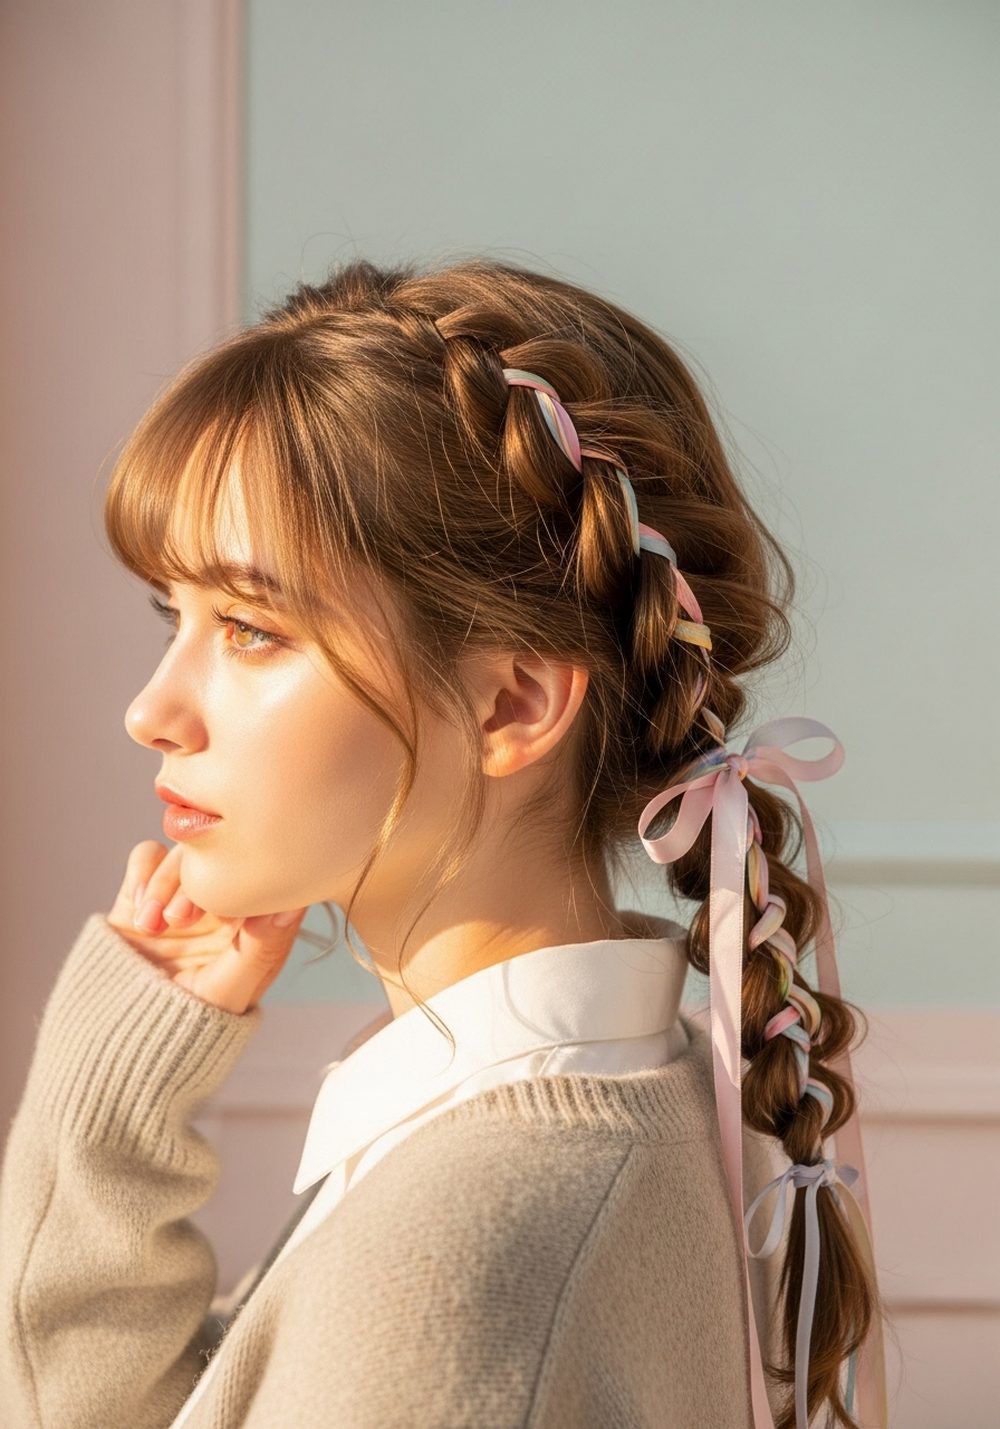
The half-up ribbon braid gives you the best of both worlds: hair out of your face, but still down and flowy. It’s a sweet, soft style that feels perfect for picture days, presentations, or anytime you want to look a little extra put-together without trying too hard. The ribbon weaved into the braid adds instant color and personality, and you can match it to your outfit, school colors, or mood. Because only the top section is braided, it works well even if your hair is on the shorter side or has a lot of texture. The half-up placement also flatters most face shapes by keeping some volume around the crown and sides.
How To Style
- Take the top section of your hair from temple to temple and gather it at the back.
- Tie a ribbon to your hair elastic, leaving two long ends.
- Divide the hair into two sections plus the ribbon as the “third” strand.
- Braid the three strands together and secure with a small elastic.
- Lightly curl or smooth the rest of your hair if you like.
Best For
- Face shapes: Heart, oval, round
- Hair types: Straight, wavy, loose curls
Tools & Products
- Brush
- Ribbon of your choice
- Small elastics
- Curling wand or flat iron (optional)
- Heat protectant spray (if using heat)
4. Dutch Pigtail Braids
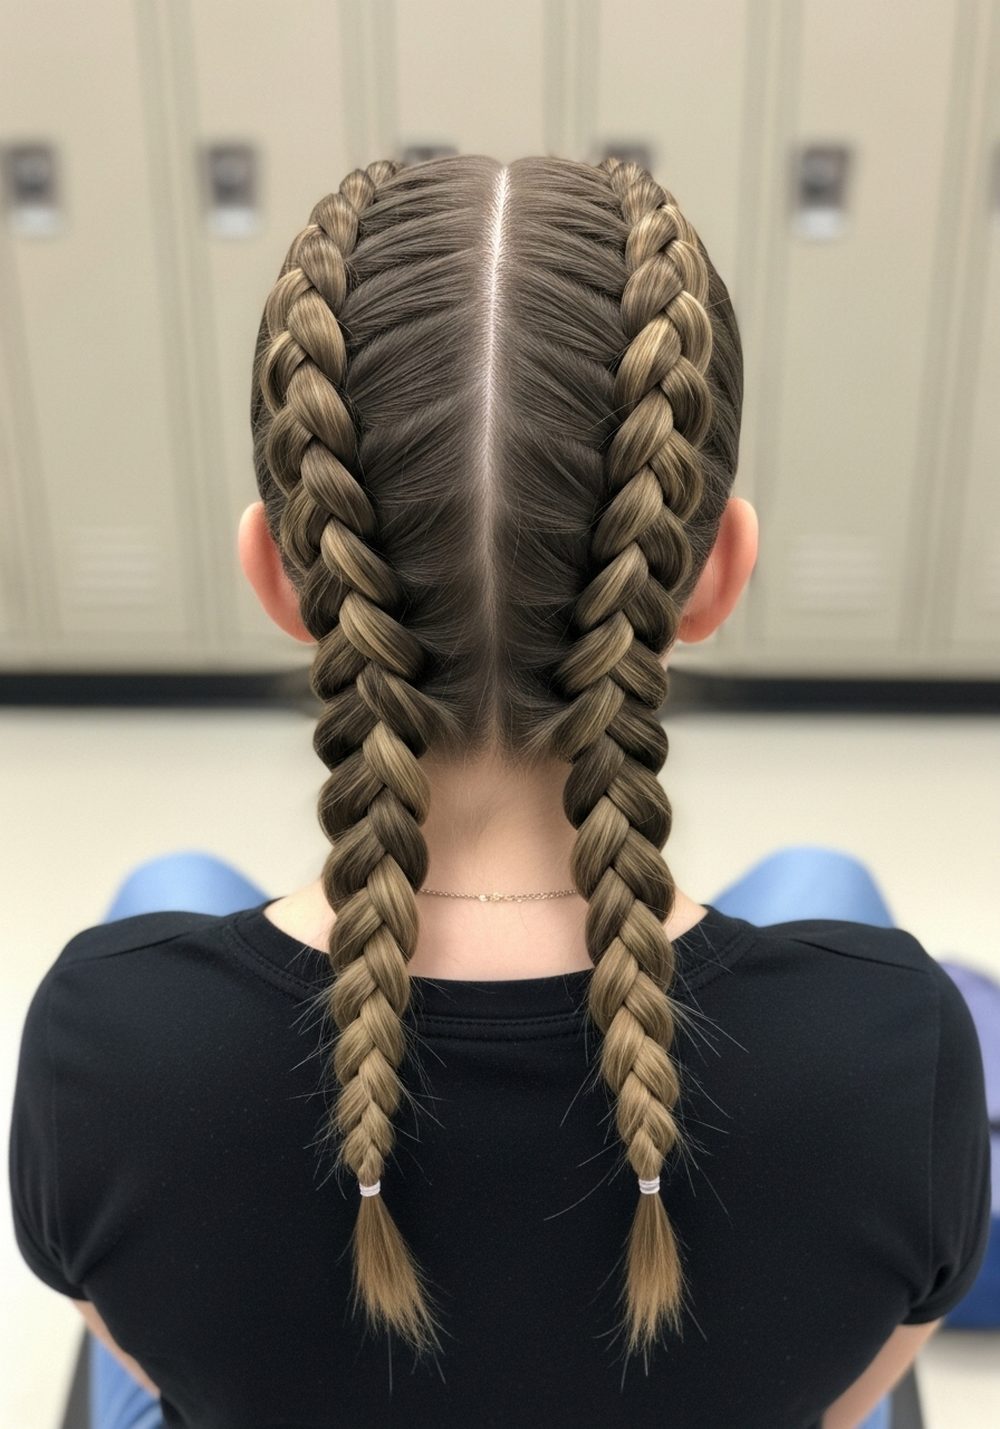
Dutch pigtail braids (sometimes called “inside-out” braids) are a school-day classic. They start at the front hairline and follow your part down to the nape, which keeps every little strand tucked in and secure. Because the braid sits on top of the hair instead of blending in, it looks bold and defined and holds up beautifully through long days, sports, or bus rides. This style is perfect if you have slightly frizzy or thick hair and want it completely out of the way. Once you get the hang of the pattern, it becomes a quick go-to. You can keep them tight and sleek or gently pull on the braid sections for a softer, chunkier look.
How To Style
- Part hair down the center, all the way to the nape.
- Clip one side out of the way.
- On one side, take a small section at the front and divide into three.
- Cross the outer pieces under the middle (not over), adding hair as you move back.
- Once you reach the nape, finish with a regular braid and secure; repeat on the other side.
Best For
- Face shapes: Round, oval, heart
- Hair types: Wavy, curly, thick straight hair
Tools & Products
- Tail comb for parting
- Sectioning clips
- Small elastics
- Edge control or light gel
- Hairspray
5. Fishtail Side Braid
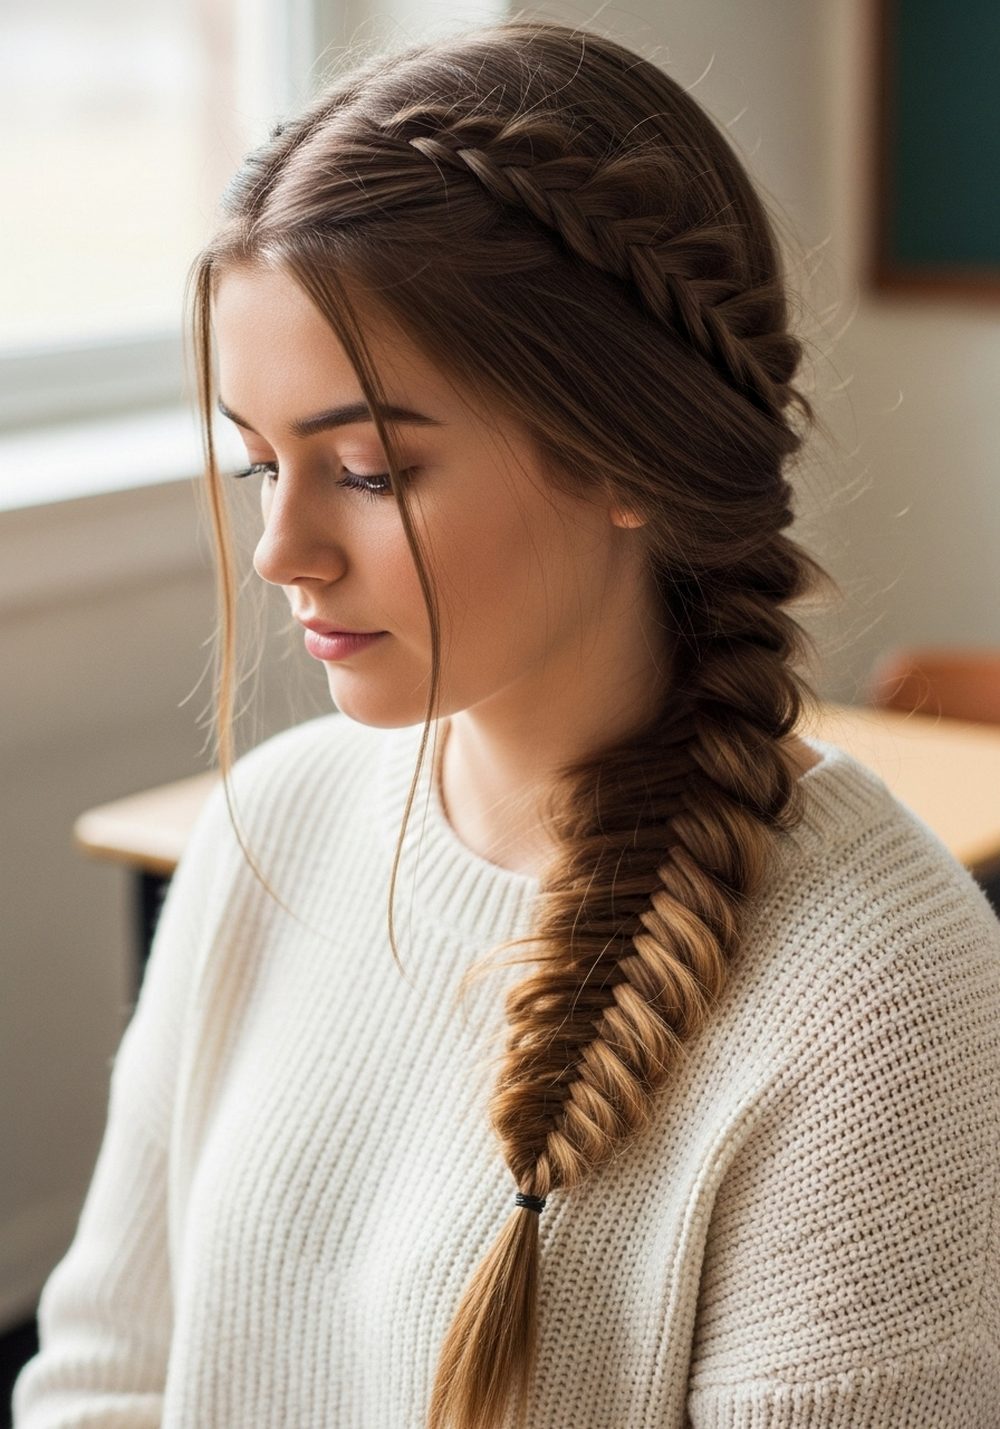
A fishtail side braid looks detailed and fancy, but it’s easier than it seems once you understand the pattern. Worn over one shoulder, it’s perfect for showing off in photos or adding interest to a simple school outfit. This braid works especially well on medium to long hair and looks gorgeous on both straight and wavy textures. Even when it loosens a bit through the day, it still looks purposeful and relaxed instead of messy. It’s a great option when you want something more unique than a basic braid, without needing advanced skills. Softly tugging at the sections after you finish gives that full, boho look that still feels school-appropriate.
How To Style
- Sweep all your hair over one shoulder and secure loosely with an elastic if needed.
- Split the hair into two equal sections.
- Take a small piece from the outside of the left section and cross it over to the right.
- Repeat on the other side, switching small pieces across until you reach the ends.
- Secure with an elastic, then gently pull the braid to widen it.
Best For
- Face shapes: Oval, heart, long
- Hair types: Straight, wavy
Tools & Products
- Brush
- Small elastics
- Light texturizing spray
- Smoothing cream for ends
- Hairspray for hold
6. Braided Headband
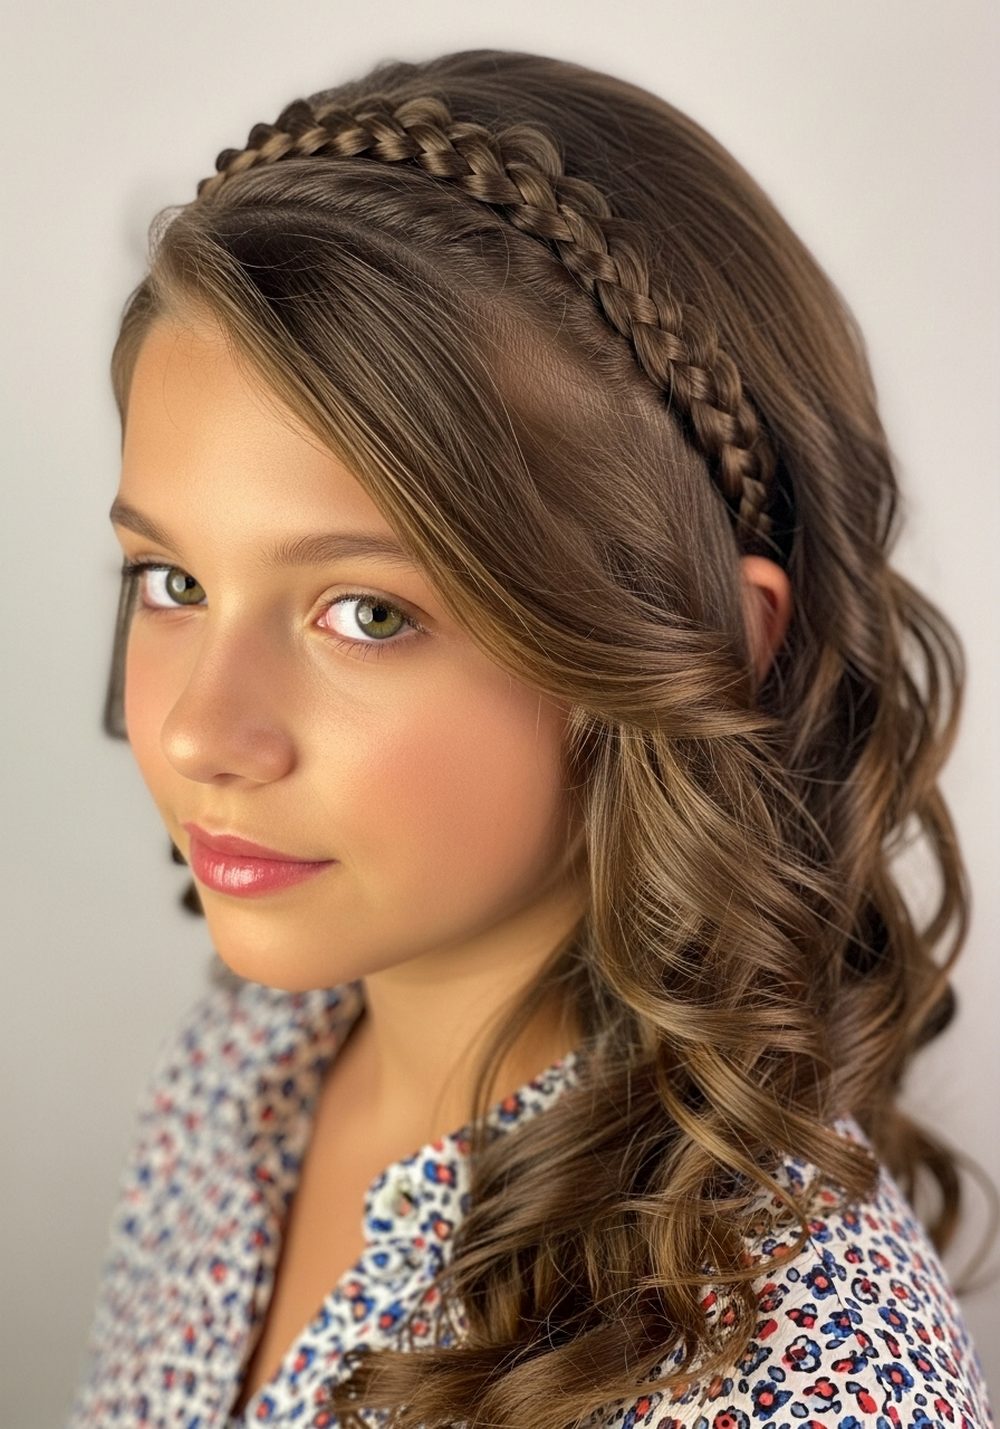
The braided headband style is ideal when you want your hair mostly down but hate when it falls into your eyes during class. You create a “headband” using your own hair, which looks soft and natural and works for both casual days and slightly dressier school events. This style is especially cute on wavy or curly hair because the texture makes the braid stand out. It also suits most face shapes by opening up your forehead and showing off your features. Even if the rest of your hair gets a little frizzy by the end of the day, the braided headband keeps the front neat and pulled back. You can leave the braid slim or gently fan it out for a more romantic look.
How To Style
- Take a section of hair from just above one ear.
- Braid it in a simple three-strand braid all the way to the ends and secure.
- Bring the braid across the top of your head like a headband.
- Pin it behind the opposite ear with bobby pins.
- Lightly blend the ends into your hair and fluff your waves or curls.
Best For
- Face shapes: Round, heart, oval
- Hair types: Wavy, curly, straight with some volume
Tools & Products
- Brush or wide-tooth comb
- Small elastic
- Bobby pins
- Lightweight mousse or curl cream
- Hairspray (optional)
7. Bubble Braid Ponytail
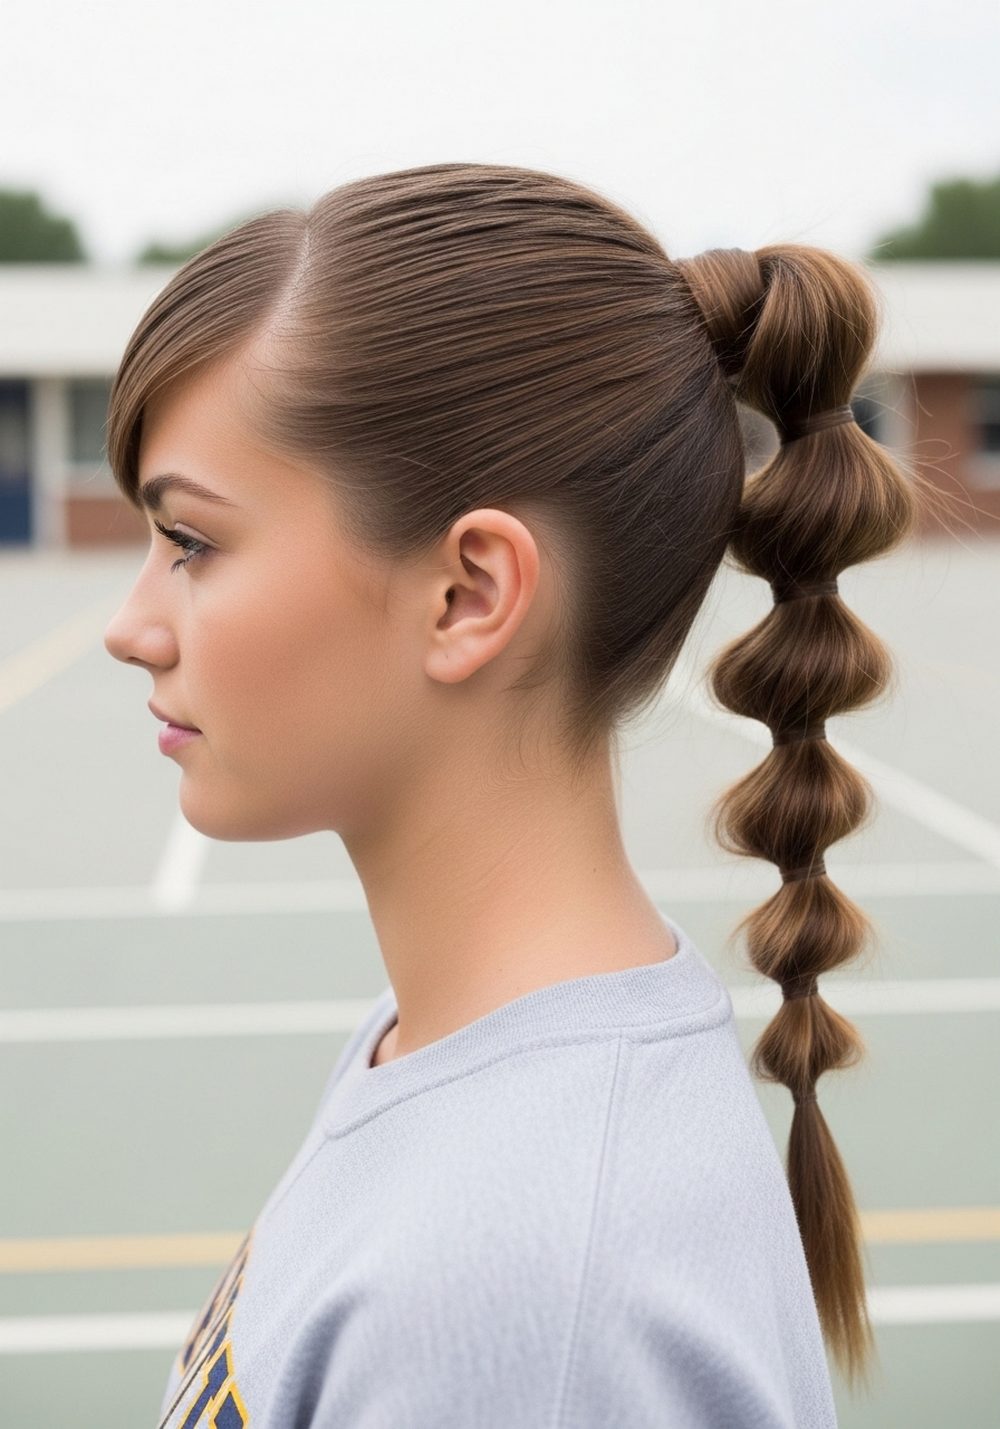
The bubble braid ponytail gives braided vibes without any actual weaving, making it great for beginners or busy mornings. It looks playful and modern and is perfect for school spirit days or casual Fridays. By adding elastics down the length of the ponytail, you create “bubbles” that stay put all day, even if you move around a lot. It’s comfortable, works on many hair types, and holds shape even in humidity. This style is also kind to hair because you’re not pulling or twisting it as tightly as some braids. You can wear it high, mid, or low depending on what flatters your face and what feels best under your backpack.
How To Style
- Brush hair into a ponytail at your preferred height and secure.
- A few inches down the ponytail, add another elastic.
- Gently pull the section between elastics to create a “bubble.”
- Repeat adding elastics and puffing out sections until you reach the ends.
- Smooth flyaways around the front with a bit of gel.
Best For
- Face shapes: Round, square, oval
- Hair types: Straight, wavy, light curls
Tools & Products
- Brush
- Several small elastics
- Strong ponytail holder
- Smoothing cream or gel
- Light-hold hairspray
8. Braided Low Bun
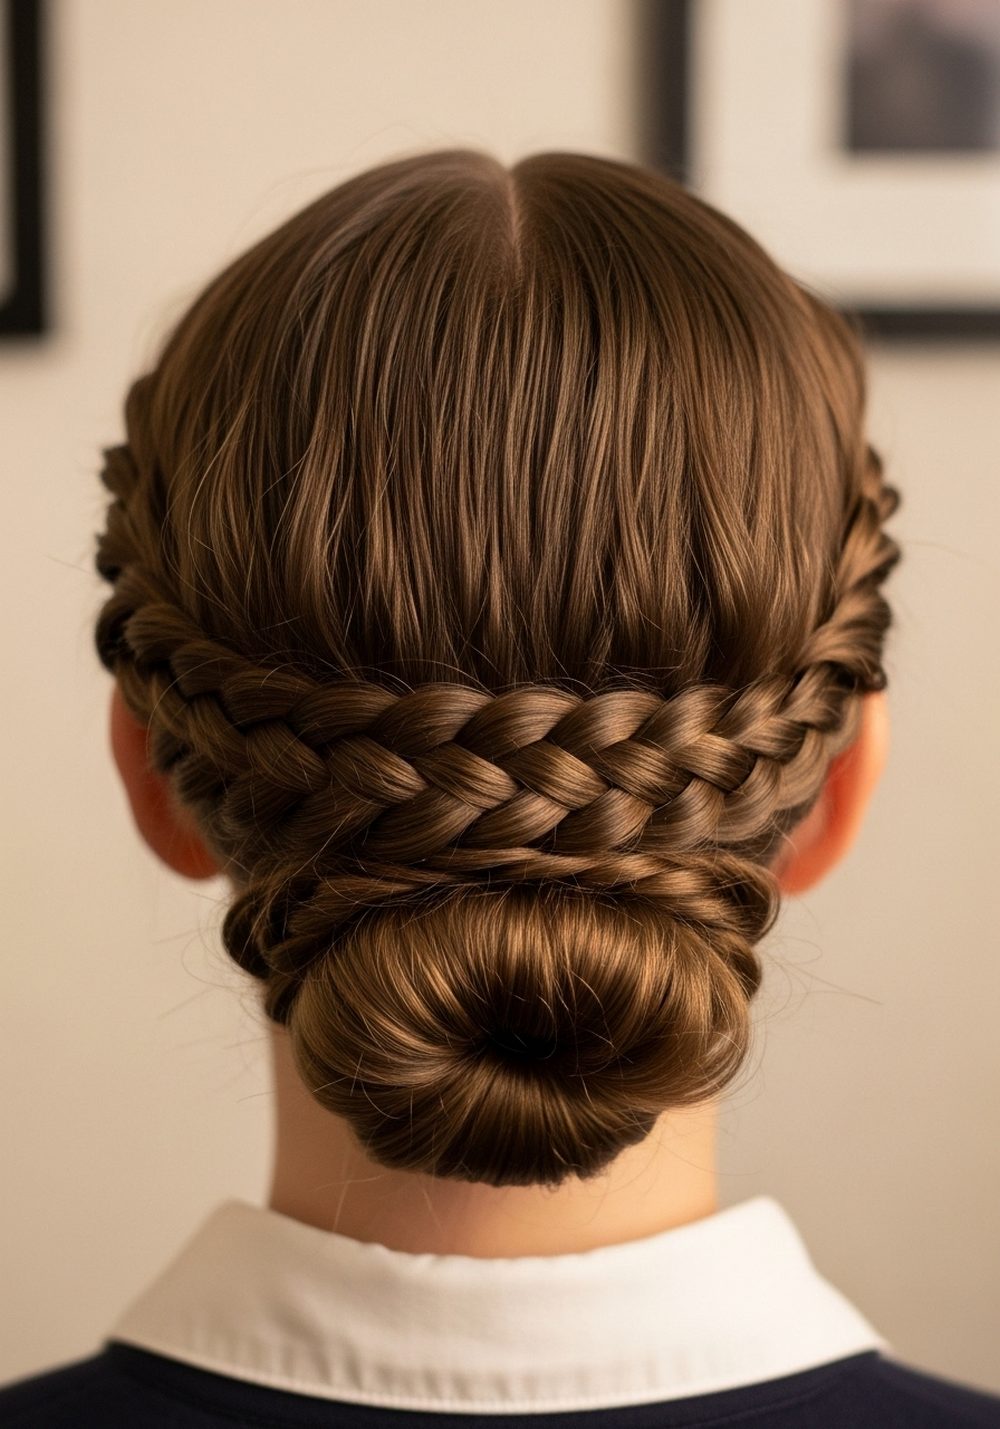
The braided low bun is a calm, classy style that still feels relaxed enough for everyday school wear. It’s perfect for days when you need your hair completely controlled, like lab days, exams, or performances. Starting with a simple braid and then wrapping it into a bun helps it stay secure and polished, even if your hair usually slips out of regular buns. This style looks good on straight, wavy, and curly hair and can be worn sleek or slightly undone. It sits low at the nape, so it’s comfortable against chairs and does not tug too much on your scalp. Add a simple scrunchie or cute clip to finish the look.
How To Style
- Brush hair back into a low ponytail and secure at the nape.
- Braid the ponytail into a simple three-strand braid and secure the ends.
- Twist the braid around the base of the ponytail to form a bun.
- Pin in place with bobby pins.
- Smooth flyaways and set with light-hold spray.
Best For
- Face shapes: Oval, heart, long
- Hair types: Straight, wavy, curly
Tools & Products
- Brush
- Ponytail elastic
- Small elastic for braid end
- Bobby pins
- Hairspray or styling cream
9. Boxer Braids into Ponytail
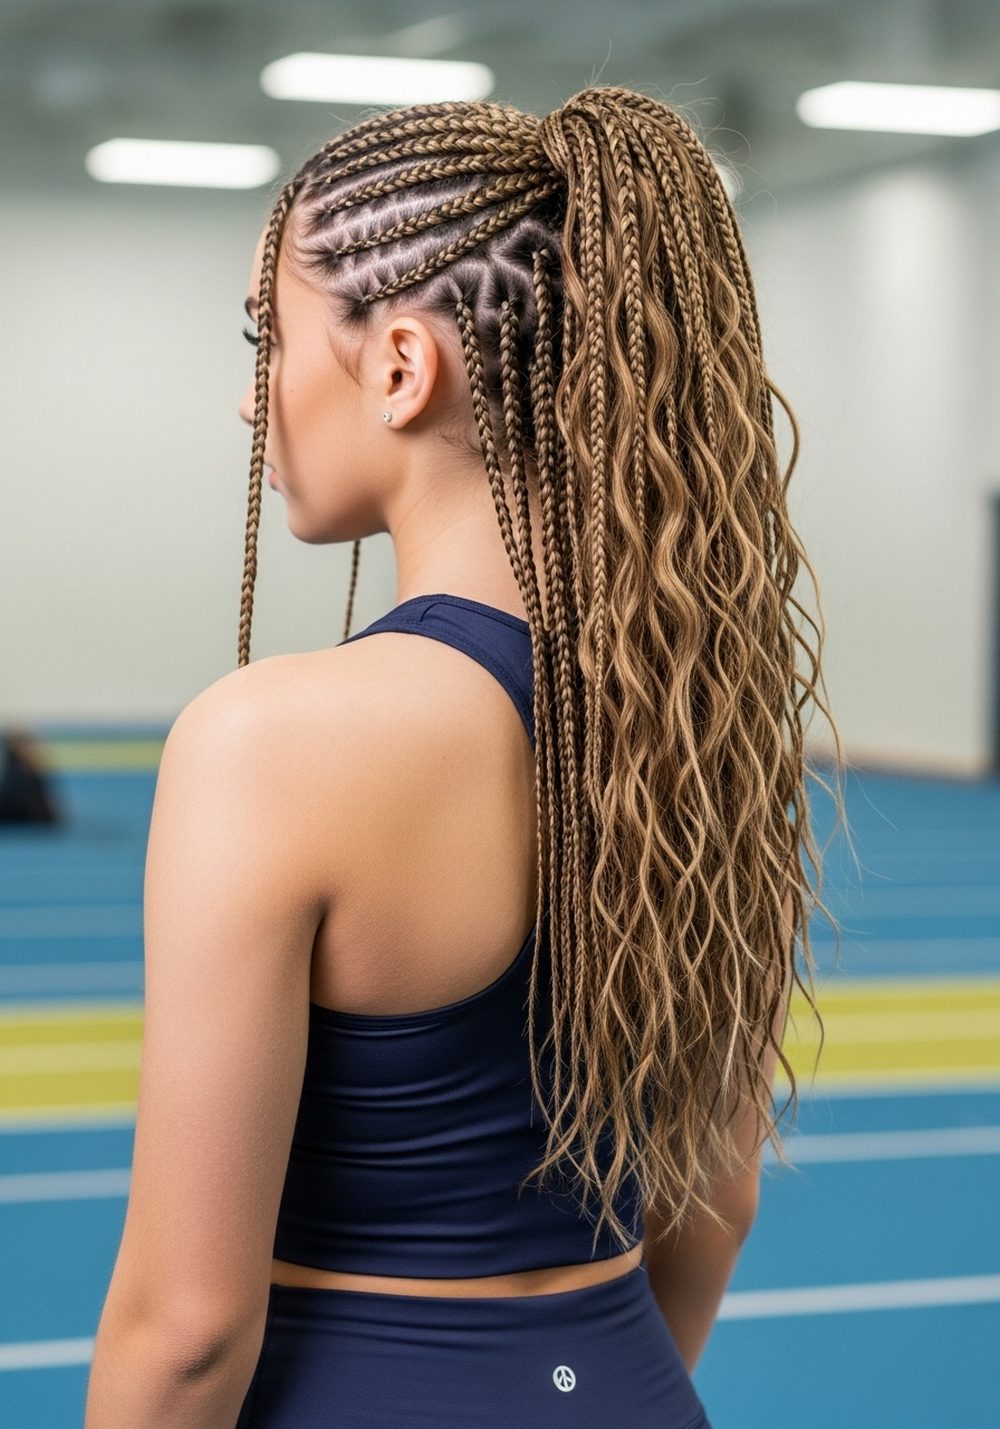
Boxer braids into a ponytail mix sporty energy with practicality. You start with two Dutch braids at the top and sides, then join them into one ponytail at the back. This keeps the front and sides very neat while giving you a swishy ponytail that still feels fun. It’s a great style for busy, active school days when you don’t want to think about your hair at all. The braids help control new growth and shorter layers, so it’s ideal if you’re in between haircuts. Once secured, it usually stays put from first bell to last without much touch-up needed.
How To Style
- Part hair down the middle to the crown.
- On each side, create a Dutch braid from the front hairline back toward the crown.
- Stop braiding when you reach the back of your head and secure each with an elastic.
- Gather both braided sections and the rest of your hair into one ponytail.
- Secure with a strong elastic and smooth any flyaways.
Best For
- Face shapes: Round, heart, oval
- Hair types: Straight, wavy, mildly curly
Tools & Products
- Tail comb for parting
- Sectioning clips
- Small elastics
- Strong ponytail holder
- Gel or cream for edges
10. Tiny Accent Braids
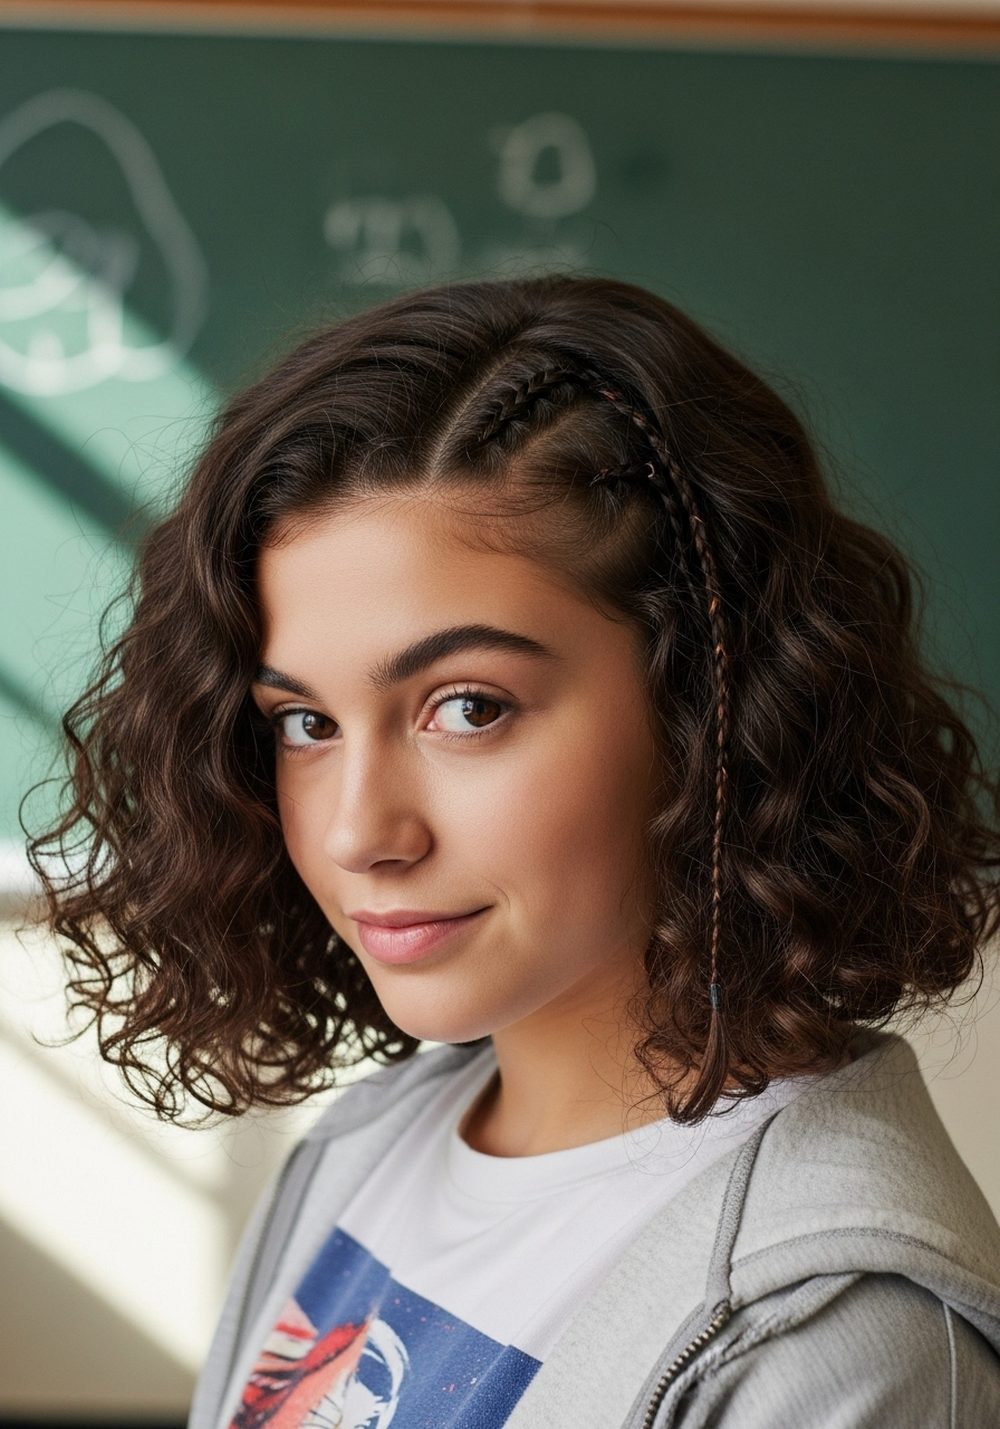
Tiny accent braids are perfect when you want a small twist on your usual down style without committing to a full braided look. You can place one or two small braids near your part, at the temples, or mixed through the front sections. They help control fringe or face-framing pieces so they don’t fall into your eyes during class, while still letting most of your hair stay loose and natural. This style is quick, cute, and very flexible—you can change where the braids sit depending on your mood or outfit. It works on nearly every hair type and length that can hold a small braid.
How To Style
- Style your hair down as you normally do (straight, wavy, or curly).
- Pick a small section near your part or temple.
- Divide it into three and braid down to the ends.
- Secure with a tiny elastic and repeat on the other side if you like.
- Lightly tug the braids for a softer look, or keep them tight for a sharp finish.
Best For
- Face shapes: All face shapes
- Hair types: Straight, wavy, curly, coily (front sections long enough to braid)
Tools & Products
- Comb
- Tiny clear elastics
- Light styling cream
- Edge brush (optional)
- Hairspray (optional)
Conclusion
Braids are one of the easiest ways to keep school mornings calm and still feel put-together all day long. Once you learn a few basic patterns, you can mix and match these styles to suit busy days, special events, or lazy Fridays. Start with the simplest braid that feels doable, then practice it a few times when you’re not rushing. Over time, your hands will remember the moves, and styling will feel faster and smoother.
Call to Action
Pick one braid from this list for tomorrow, lay out your tools tonight, and time yourself in the morning so you can turn it into your new go-to school hairstyle.
FAQs
1. How do I make my school braids last all day?
Start with dry, brushed hair and use a bit of light mousse or texturizing spray for grip. Keep your braids snug but not painful, and finish with a small amount of hairspray around the hairline and ends.
2. What if my hair is too short for most braids?
Try tiny accent braids, a braided headband, or a short half-up braid that only uses the top section. As your hair grows, you can add styles like low braids or bubble braids that need a bit more length.
3. How can I stop braids from hurting my scalp?
If your head feels sore, the braids are probably too tight. Loosen the base near your scalp with your fingers, avoid super tight elastics, and skip styles that pull hard at the front hairline.
4. Do I need special products for braid hairstyles?
You don’t need anything fancy. A brush, small elastics, a bit of styling cream or gel, and light hairspray are usually enough to keep braids neat and smooth for school.
5. Can I sleep in these braids and wear them again the next day?
Some styles, like Dutch pigtails or boxer braids, can last overnight if you sleep on a satin pillowcase. In the morning, check for loose sections, smooth flyaways, and add a little product to refresh the style before heading to school.


